Support Home > Learn The Nerd >
ShipNerd 101
Just “the basics” on how to create a label and ship a package.
You must first create a ShipNerd account, click here to sign up.
1). ENTER ADDRESS INFORMATION:
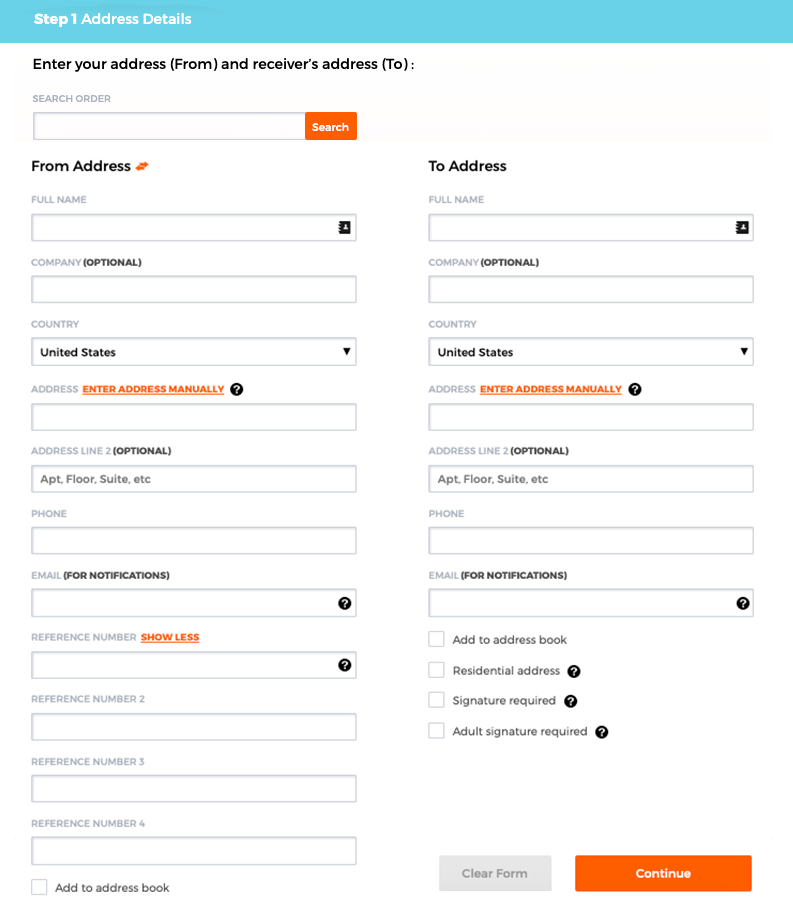
Enter your address (From) and the receiver’s address (To). Check the appropriate boxes to save the address, request a signature, or flag it as residential. Include an email and phone number so the sender and receiver will receive notification emails and can be contacted by the courier if needed.
Reference Number: This is an optional identifier that you define. It could be a purchase order (PO) or customer number, a name or phrase — such as “new ShipNerd shirt”. Use any combination of letters and numbers up to 30 characters. Reference Number fields 1 & 2 will print on your label.
Click “Continue”.
2). SELECT PACKAGE TYPE:
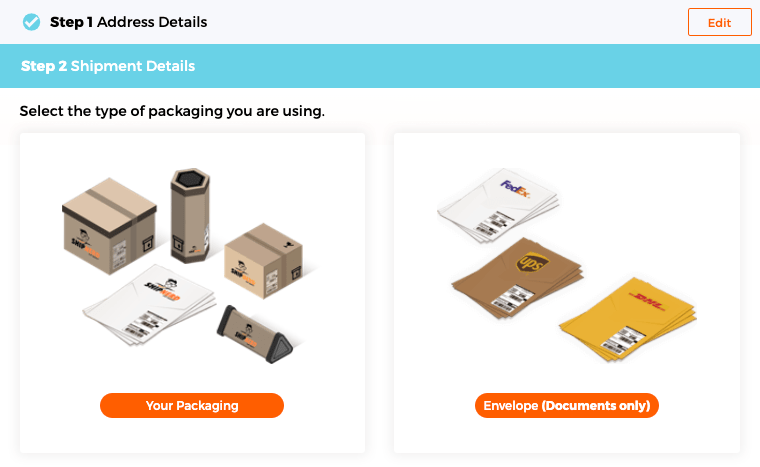
Here you select “Your Packaging” OR “Envelope (Documents only)”. This should only be used for documents that have no value, (e.g. shipment of books, artwork, antique maps, etc should not select this package type).
3). ENTER PACKAGING DETAILS:
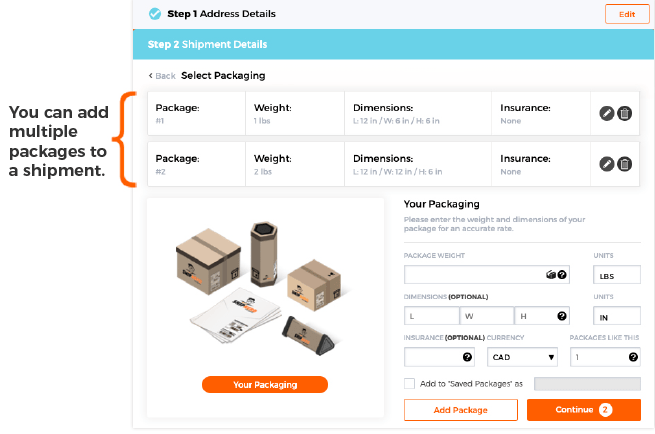
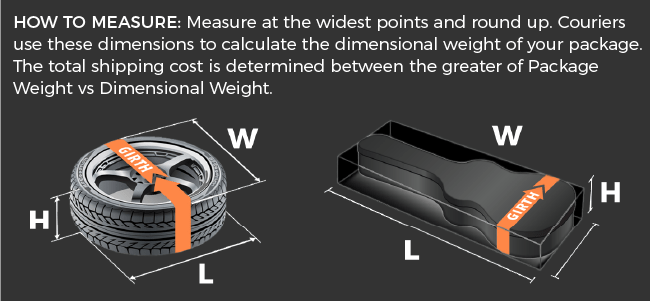
Weight & Dimensions: Entering dimensions (Imperial or Metric) is optional but doing so ensures the most accurate rate quote. The more accurate your weight and dimensions are, the more accurate your shipping quote is going to be. Couriers charge (the billable weight) on the greater between actual weight and dimensional weight. Click here to learn more about dimensional weight, actual weight and billable weight.
Insurance: You can also add optional insurance if the package is valued at over $100. Learn more about insurance coverage here.
Add to Saved Packages: If you want to save this package profile to use again for future shipments, Select the “Add To Saved Package” checkbox, and enter the name to reference the saved package as. To load your saved packages, click on the Box icon in the Package Weight field.
Editing Packages in a Shipment: You can edit a package by clicking the pencil icon or delete it by clicking the trash bin icon
Once done, click “Add Package”. You can add a 2nd package to this shipment to create a multi-piece shipment, or click “Continue” to proceed to the next step.
4). CUSTOMS DETAILS (for international shipments):
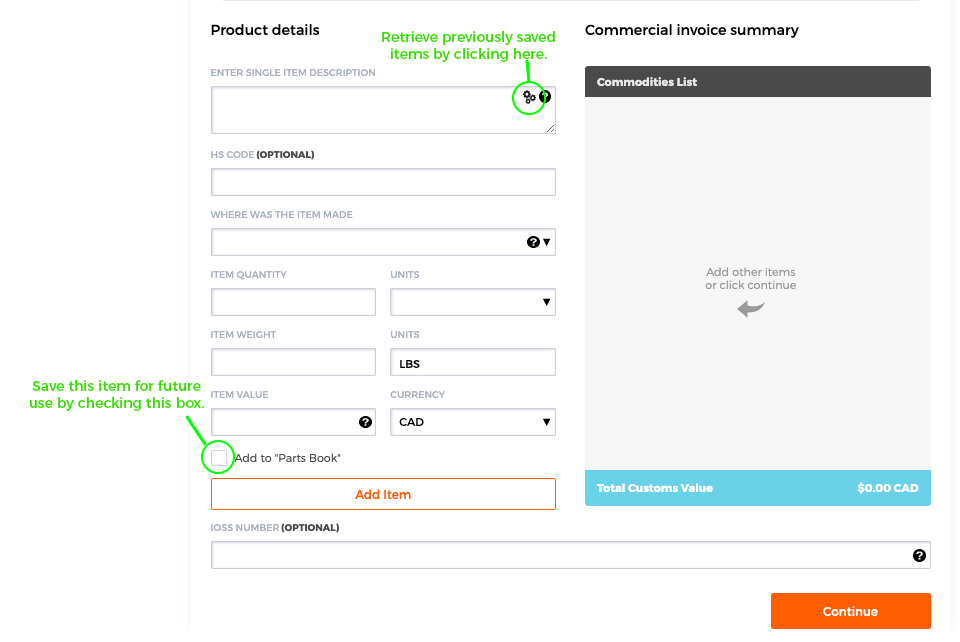
Select the purpose of the shipment (commercial, gift, sample, etc or document type) from the dropdown menu and enter the product details. Click “Add Item” when finished to add the item to the commodities list. Repeat to add additional items, if needed, then click “Continue”.
5). SELECT SHIPPING SPEED (and Price):
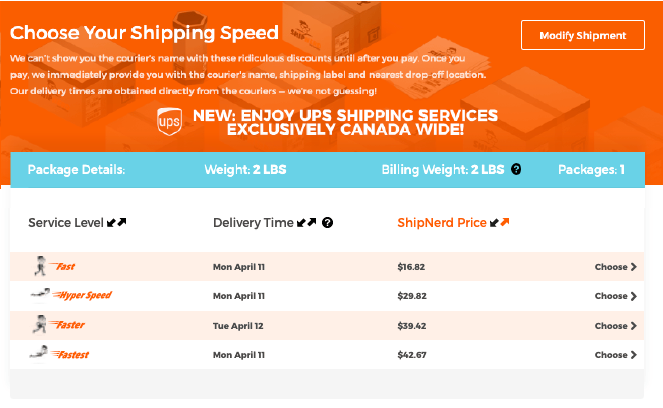
At this point, ShipNerd retrieves real-time shipping quotes and estimated transit times from carriers based on the information you’ve entered. The quotes are arranged by price:
You may see one, more than one, or no option at each speed, (depending on service availability). You won’t know which carrier will be used until you select your transit time. Once you complete the order, we immediately provide you with the courier’s name, the shipping label, and the 10 nearest drop-off locations.
6). PRINT YOUR LABEL :
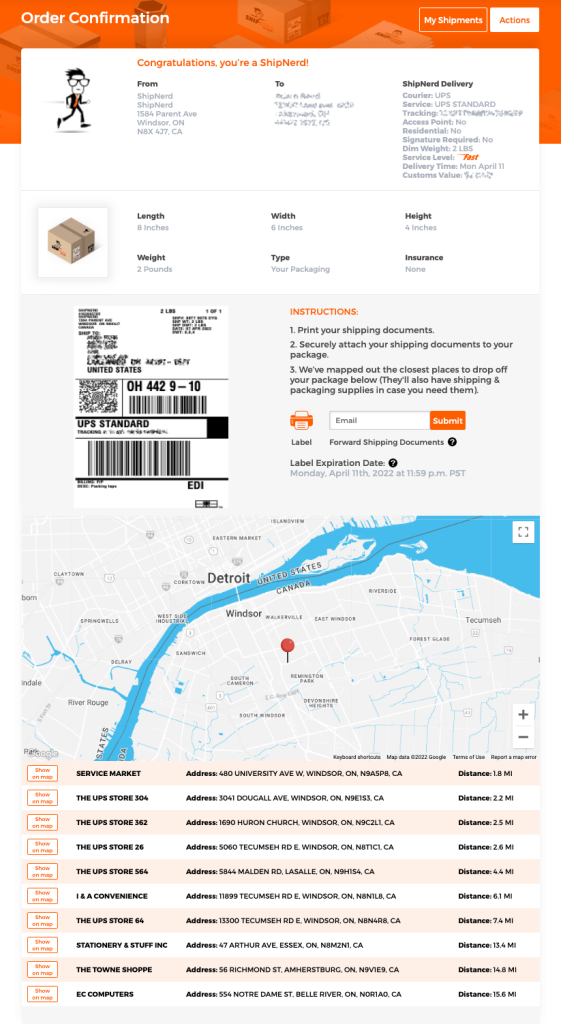
At this point, you can see which carrier and service level was selected (ie: UPS Standard, UPS Next day, etc). The shipping label is in printer-friendly PDF format. (ShipNerd also supports thermal label printing formats, visit the Account settings page to enable this setting).
You’ll also see the tracking number. If you entered the receiver’s email address in Step 1, they’ll get an email notification advising them that you’ve created a shipping label, with the relevant tracking information and when to expect their package.
If you’re supplying a shipping label to someone else, (e.g. – you’re having a package shipped to you and you’re paying the shipping), ShipNerd makes it simple. Enter the email address of the sender in the “Forward Shipping Documents” field, click “submit”, and the pre-paid shipping label and shipping documents will be emailed to that address.
Click the orange printer icon to print the label. Labels will expire if they are not printed and used within 5 days! You will NOT be charged for any unused shipping labels. Refunds on voided / unused labels take 1-2 billing cycles to process, as we wait for our weekly statements from the shipping couriers, which will confirm which labels were and were NOT actually used.
Attach the label to your package and drop it off at one of the nearby locations that are listed.
Creating and/or printing a label does not notify the courier that a shipment is ready. The package must be dropped off at a designated shipping centre for that courier. The 10 nearest locations are provided with the label.
If you are a business shipper and are interested in pick-up functionality, please contact our support team at [email protected]