Support Home > Packing >
How To Ship Used Car Parts and accessories
Here’s a first-hand account from a member of the #NerdHerd on how they ship car parts with ShipNerd.
“Since I have two 4Runners that consistently change parts, I need a convenient method for shipping these parts. The biggest challenge I have found with shipping my used car parts is price and package size. Some of these parts are incredibly heavy and can be quite awkward to ship as well.
I wanted to share with everyone, ShipNerd.com. ShipNerd makes it pretty simple to ship used parts from my 4Runners. Whether the parts are heavy or awkward, the Nerd will usually ship it. Most importantly, ShipNerd is almost half the price of UPS, USPS, and FedEx.
ShipNerd makes shipping quick, easy, and affordable. The Nerd uses volume discounts with the top carriers to get the best deal on shipping. They have a quick quote tool that enables you to get an approximate idea of how much it’s going to ship a package from one zip code to another.
It’s pretty easy to get a quick estimate on the fly. In order to get an exact shipping quote, you’ll need to create a free account (really, it’s free).
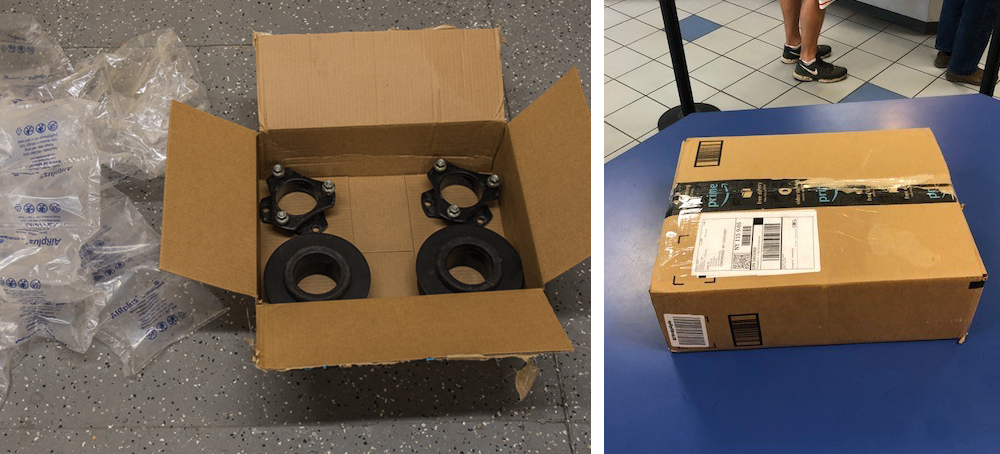
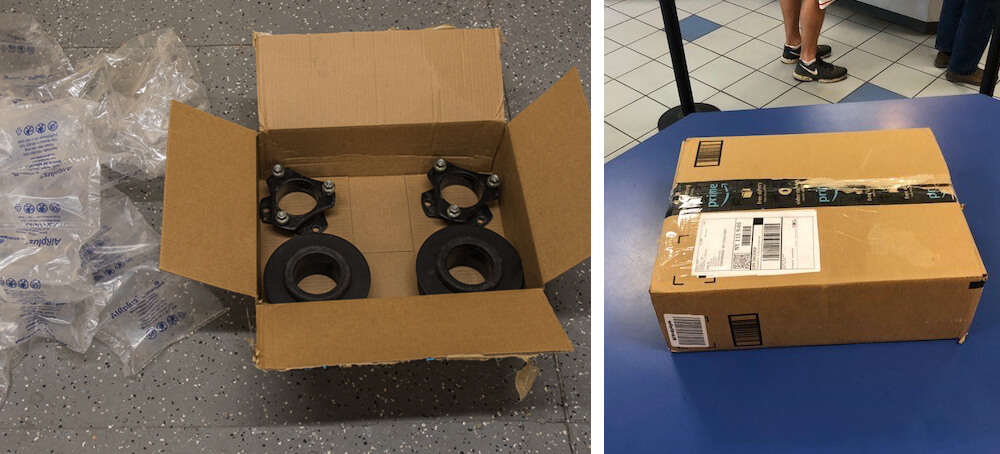
I wanted to go over ShipNerd and explain my process in how I ship used car parts. In my example, I am shipping a leveling kit that we installed on my girls 4Runner last year.
1) Create your Account – Get started with the nerd today. Creating an account on ShipNerd only requires you to input your name, email address, and password – that’s it. Once you create the account, they will send you an email verification to confirm your email address. Once you do, you’ll be able to login to the site and ship your package (and of course, get exact ship rates).
2) Create A Shipment –
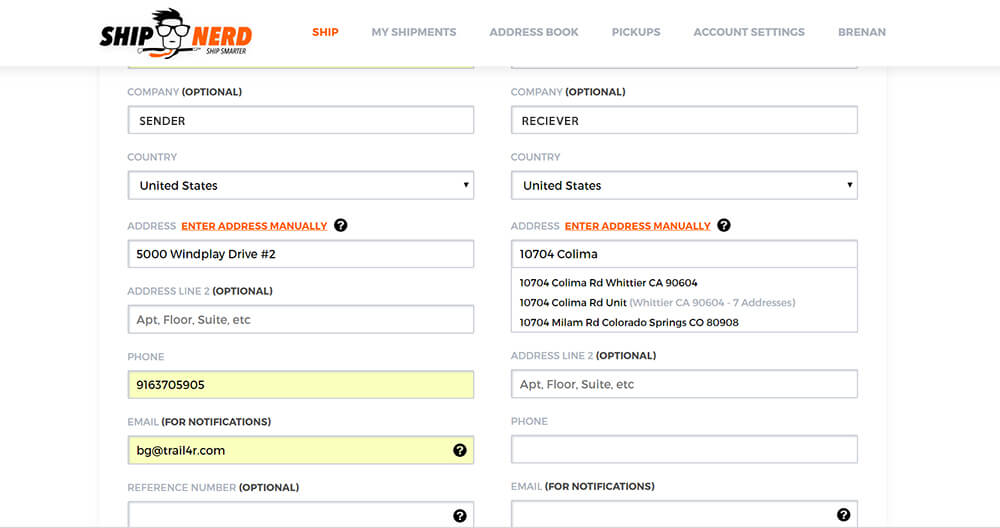
The first step in creating a shipment is making sure you have the following:
- Receiver’s Name
- Receiver’s correct address
- Receiver’s Phone Number
- Receiver’s email address – this is optional, but if you fill it in they’ll get an email notifying them that they’re getting a package from you, along with the carrier, tracking number, and estimated delivery date. If I do not have their phone number or email, I just enter my own.
ShipNerd also has a really cool address validator/auto-complete. Simply start typing in the address, and you’ll see the auto-complete try and complete the address. If it can’t find it for some reason, simply click on “Enter Address Manually” and you input the address on your own. Try using the auto-complete first though, as it really helps eliminate address correction fees. You would be amazed how many people get their zip wrong.
A couple checkboxes Add to address book, Residential/commercial address..
You’ll also notice a couple of checkboxes below the address input fields. ShipNerd allows you to easily add contacts to your address book, so that once you’ve added their address once you never have to do it again. Another checkbox that you’ll see is “residential address”. Shipping couriers charge additional fees for residential addresses. Checking this box is completely optional. Carriers (like UPS) has their own database of residential addresses, so if you leave the box unchecked, they’ll come back anyway and tell you that it’s residential when they quote out the shipment. Basically… leave it unchecked, and see if the carrier comes back and assesses the address as being residential – that’s what I found works best.
Here’s the thing that I hate with shipping I am not a huge fan of filling out a form, but if the address you provide in this form is incorrect, your package ends up getting delayed for no reason. The nerd makes the form as easy to use as possible, and they only have a few fields to fill out in order for your car parts to get from one town to another. The Nerd is pretty clutch.
3) Select Your Package Type –
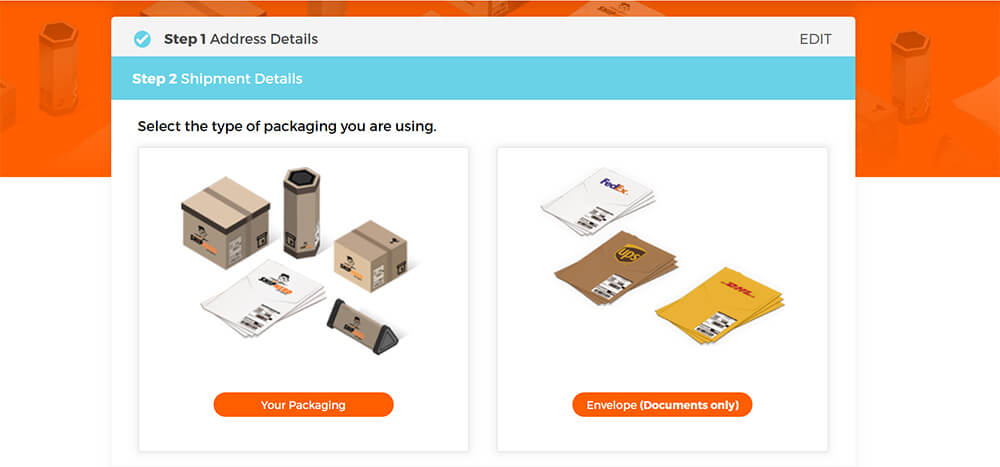
Once you’ve got the address information squared away, you’ll need to tell the Nerd what you’re shipping. At the very least, you’ll need to know the weight of the package. ShipNerd provides shipping quotes in real-time. This means that you’ll get a shipping quote based on whatever you put in this section. If you put that your package weights 10lbs, you’ll get a quote on shipping a 10lbs package between the address you indicated above. Dimensions: Dimensions are optional, but I would suggest measuring your box/item and inputting the length, width, and height as carriers charge on the GREATER of either “actual” weight or “dimensional” weight. Dimensional weight is obtained by a mathematical formula -> (L x W x H) / 139. For example, if your package only weights 10 lbs, but the dimensions are 22 x 22 x 22, then the dimensional weight of the package is 77lbs, which means that you’ll be billed for a 77 lbs package, Not 10. The more accurate your weight and dimensions are, the more accurate your shipping quote is going to be. Carriage Value: This is an optional field. Basically, you’re covered for up to $100, but if you require additional insurance for a higher value shipment, then input the total amount that you’re going to want to be insured for here. Read the tooltip though, as some things such as glass, jewelry, liquids, art, etc.. are considered “ship at your own risk”, so even if you purchase additional insurance you may not be covered.
Shipping Tip: Make sure to package your item securely with adequate cushioning and protection on the inside. In the image I have in the post, I usually wait until I get a package from Amazon and then use their bubble wrap. Their wrap and boxes have worked great for almost everything I have shipped. Carriers can deny coverage if your item was improperly packaged, so If you have something valuable, pack it well so the shipping companies don’t screw you over.
4) Multiple Shipping Options
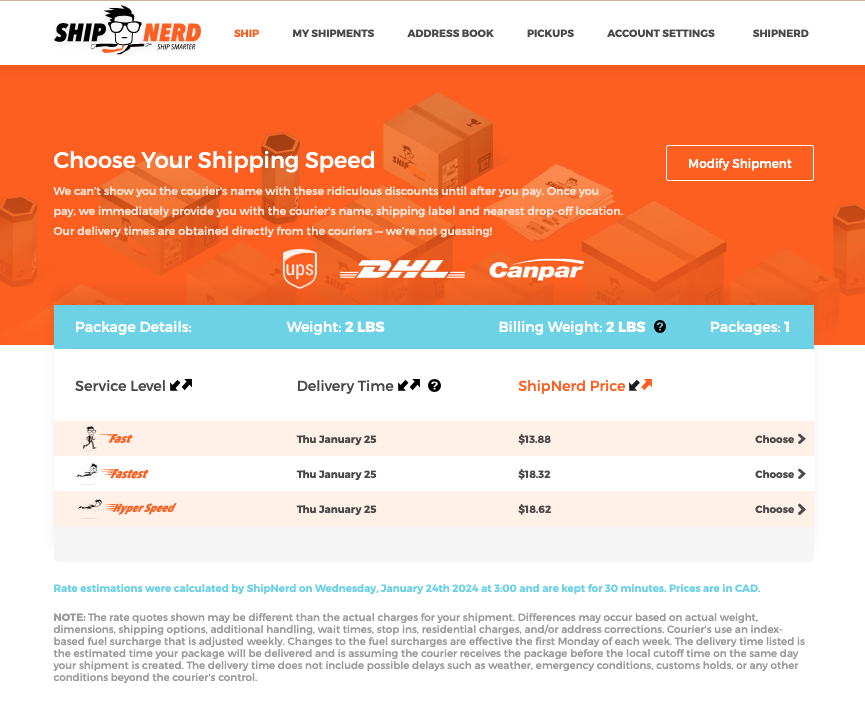
Here’s where the magic happens. The Nerd takes all the information you’ve filled out and sends it off to the carriers for shipping quotes and estimated transit time. We then group the replies from the shipping companies and break it down. 4 shipping speeds:
- Fast: 1-5 business days depending on distance. Ground Service
- Faster: 2-3 business days. Sometimes Ground and sometimes Air
- Fastest: 1-2 business day, typically by air
- Hyperspeed: 1 business day, typically by air.
- Here’s what’s cool about the Nerd, they make it really easy for you to make a decision on how you want to ship your package by showing you the transit times. In my example, there’s really no point to ship the item via “Faster”, as “Fast” will get it there on the same day for less money.
Here’s the thing, you won’t know the courier until after you pay, but that’s a small price to pay considering the savings you’re getting, Just know that it’s going to be handled by one of them, and every package comes with a tracking number. Price Savings I got a price on shipping our leveling kit from California to New York. The item was 10lbs, shipped in a basic Amazon Prime box (16x13x3). The price I got quoted from USPS was $21.22 Ground. With the Nerd, it was only $12.35 Ground.
5) Shipping (Drop-off) Locations
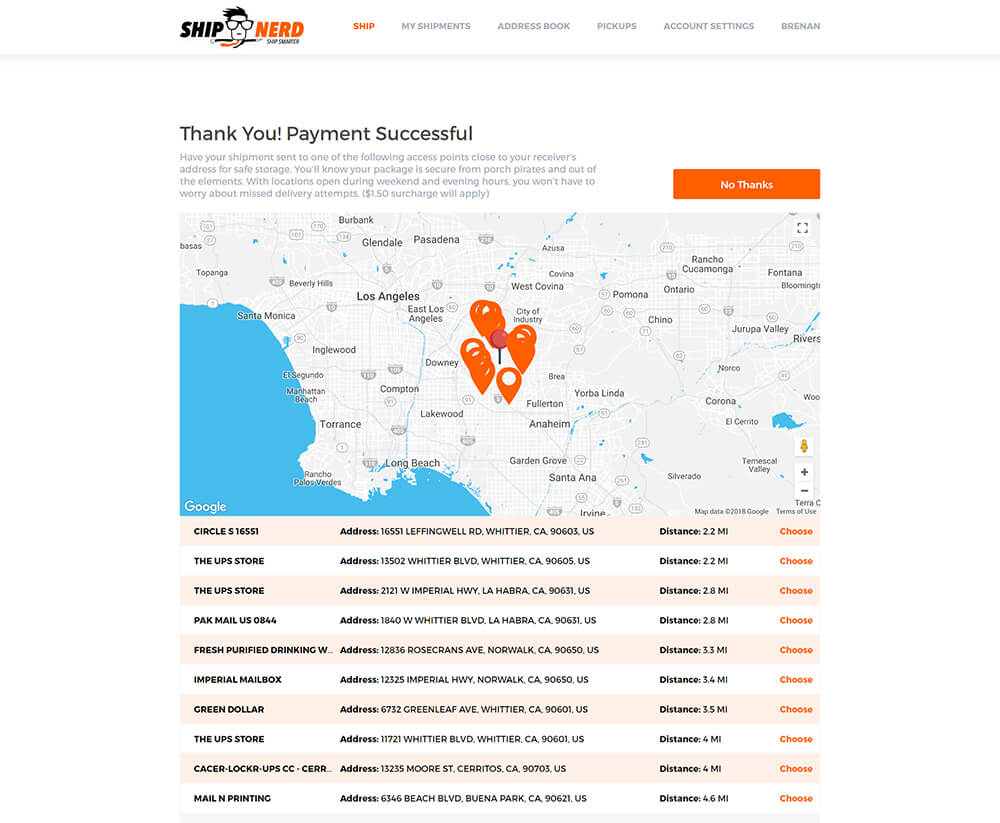
Access Points: When possible (based on what the carrier the Nerd uses, you’ll get an option to have your package delivered to an access point. An access point is an authorized drop off location where the driver can deliver the package, instead of your receiver’s house. It’s sometimes a good idea to use this option if you want to make sure that your package is not left on the front porch where it could be stolen, or damaged by rain. Drivers are pretty good though, if they deem the environment to be unsafe, they won’t leave the package, and they’ll most likely end up making the call to deliver the package to an access point near your receiver’s home if no one is home to accept the package. Again, delivering to an access point is totally optional.
6) Print Your Label
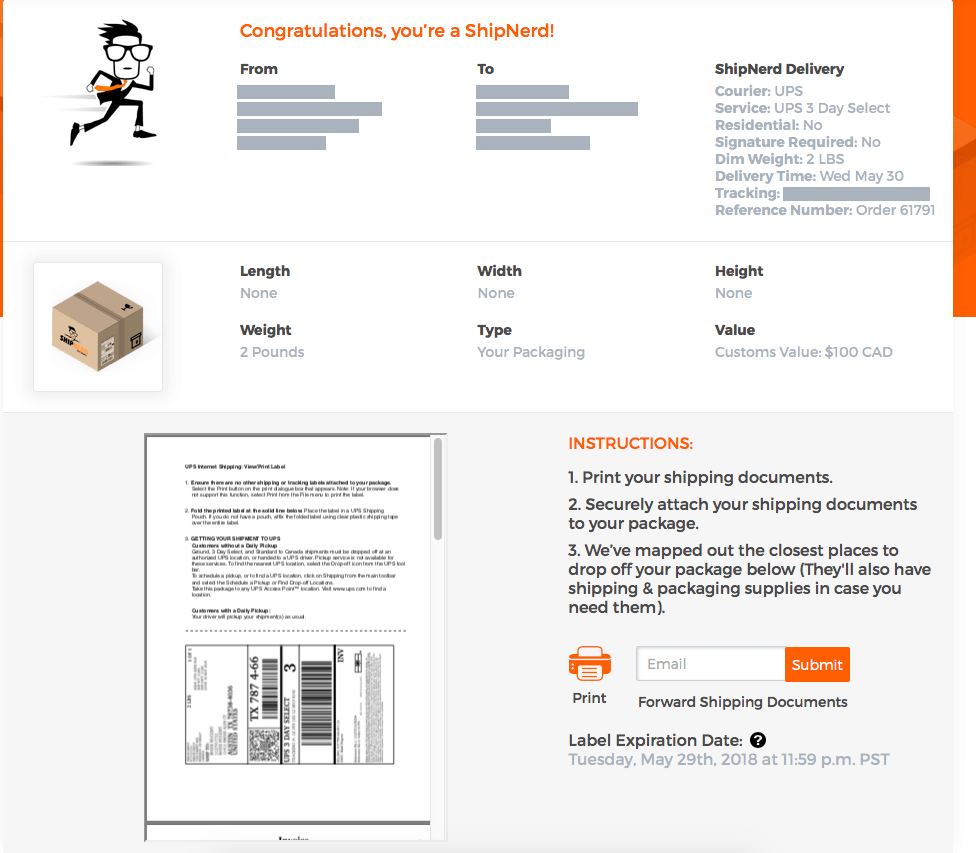
And…. Here’s your label. At this point, you can see what shipping company you got, what service level it is. You’ll also see the tracking number. If you opted to put in your receiver’s email address in step 1 of the ship form they’ll get an email with the same information so that they know you’ve generated a shipping label, and when to expect their package.
Another handy little tool is the “Forward Shipping Documents” text box.
If you’re having a package shipped to you, simply put the shipper’s email address into this field and they will get a copy of the shipping documents. It’s a great way to get the best deal on shipping when buying used car parts from someone else, as you know the true shipping cost of the item. Simply have them package up the item, provide you with the weights and dimensions, and you’re done!
Slap your Shipping Label on the box!
At this point, you can print up the shipping label (it prints up as a PDF), and stick it on the box. Make sure the label is secure though, as you don’t want it coming off while in transit. A smart thing to do is print up a second copy of the shipping label and stick it inside the box as if the label falls off the shipping companies are trained to open up the box and see if there is a secondary label they can reference.
Article By: Brenan – Trail4R
